HR administration is not as simple as it may seem. And because we know this, we've prepared a simplified guide to help you set up Sloneek. Try not to skip the steps, trust us, we know why. If you don't need some of the sub-functionality, move on. But still go step by step.
Here we go:)
✅ It won't work without users
First, familiarize yourself with the user roles in the application. This is key to understanding and deciding what rights to assign to each user within the application.
To add new users to the application:
- manually
- by importing from Google Workspace or Microsoft Active Directory (if you don't know what we're talking about, ask IT)

You can then edit each user's card to suit your needs. Learn more about setting up and managing users here.
TIP: If the predefined fields in the user tabs are not enough for you, you can create your own. You can use them to record almost everything from various anniversaries and reminders to employee shoe sizes.
✅ Create teams and have a perfect overview of your company structure
In order for your people to effectively approve absences or work with competency models, it's a good idea to first create teams and assign users to them. Simply create a new team in the Company / Teams section by clicking on the Add button.
Then enter the name of the team and its parameters. Here you can select a team manager who will approve absences or add evaluations, and also assign additional roles to some users such as Supervisor, Activity Planner, or Arrivals and Departures Manager. You can read more about each role here.
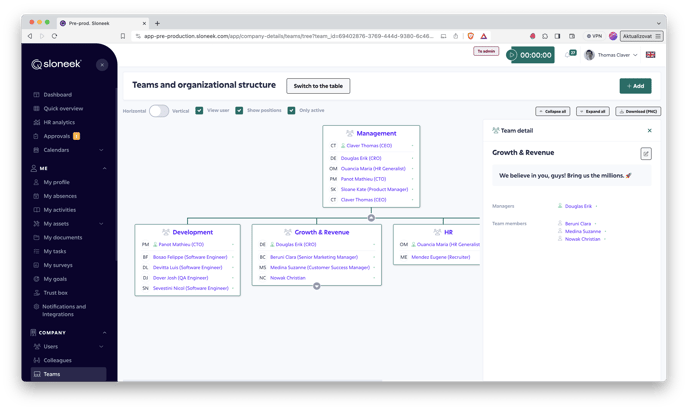
You can also read more details about the teams and the company structure in our article.
✅ What are your employees' work contracts?
Creating, setting up and assigning working hours to users is absolutely crucial for the ability to draw absences and for reports to work properly. Therefore, make sure that every user will have working hours assigned.
You create and set up the working hours in the Settings / Work contracts setup. You then assign it to users in their user tabs under the Contract and Payroll tab.
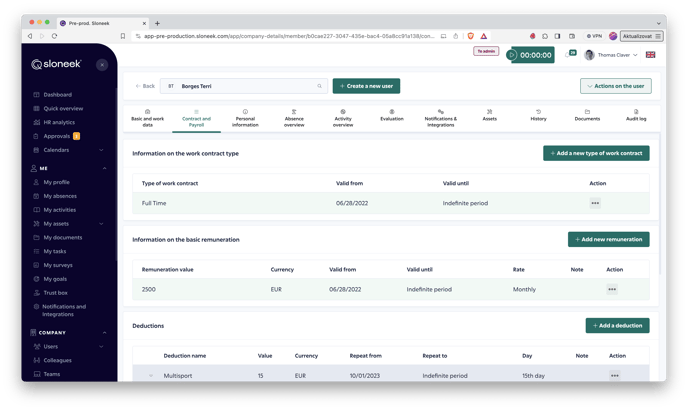 Detailed instructions on how to set working hours can be found here.
✅ Everyone needs to go to the doctor or on holiday sometimes
You can create new types of absences that each user will be able to draw in Settings / Absence. After clicking on the Add button, select which type of absence it is and set its parameters. You can read about setting up absences in more detail in our article.
Once you have created an absence, don't forget to assign it to users. The easiest way to do this is to go to the Bulk setting of absences section, where you will allow selected users to use absences. From here, you also have the option to set whether you want the absence to be subject to supervisor approval or to be approved automatically.

At the moment, you have a Sloneek account set up for basic use. You will only need reports.
✅ How do you intend to record work?
We know from experience that everyone has a slightly different idea of attendance. To help you decide which of our modules for recording work is really the most suitable for you, the following breakdown will help you:
🙋 A. Arrivals and Departures
Keep track of when employees come to work and when they leave.
Each user records all clock-ins and clock-outs using a terminal, mobile or web app. As part of the reporting, we'll show you the balance of recorded attendance against working hours.
To set up the entire module, including setting up the attendance terminal, follow the instructions here.
⏱️ B. Activities and time tracking
Record the time spent on each work activity. Employee arrivals and departures are not that important to you.
Employee clock-ins and outs are not that important to you. But what you want to track is the timesheet. Users record time spent on specific activities. The logging is done through a mobile or web app. By entering the event into a reporting calendar or using an automated time counter.
Check out the article here to see in more detail how time tracking can be used.
Follow the instructions here to set up the module. If you want to sort the reported work into specific client projects, follow the instructions here.
🏖️ C. Working hours and absences
Set only working hours and manage absences. Tracking arrivals and departures or measuring time spent on activities is not important to you.
Bingo! 🤗 You have already set up working hours and absences in the previous steps.
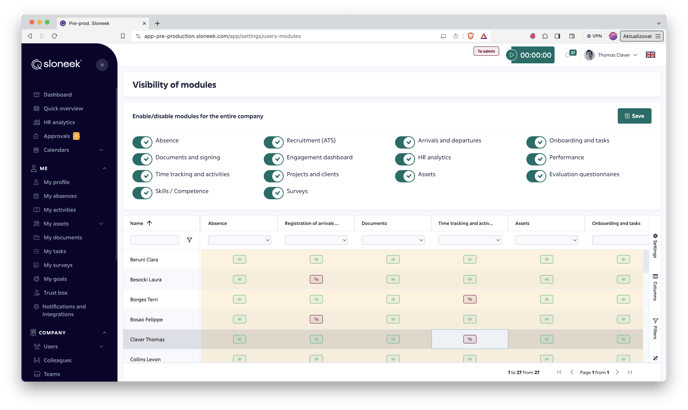
✅ Hide modules you don't need
Following on from the previous step, you may also want to consider whether it would be beneficial for you to completely hide modules from employees that they don't use. For example, if you choose to record work using Activities but don't need to track employee arrivals and departures, you can simply turn off the entire Arrivals and Departures module so that it doesn't confuse users unnecessarily.
You can do this in the Company / Users / Visibility of modules section. In the respective columns you will find green and red locks - green means that the user has the module enabled, red means that the module is hidden to the user.
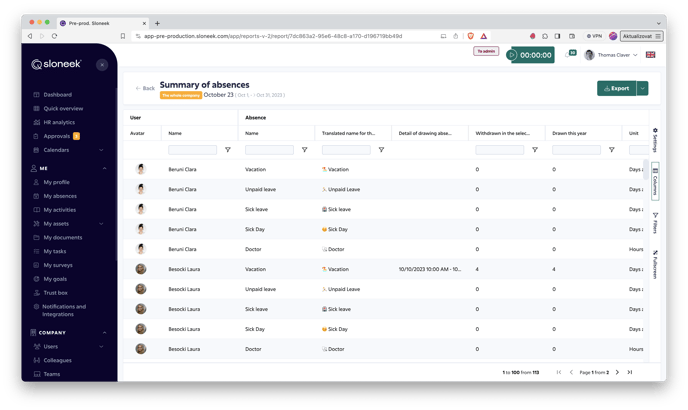
✅ Experience the simplicity and robustness of reports
Reports are the unwavering pillar of systematic work. Try entering some absences or a few work activities into a calendar for a test user and generate your first Sloneek report! You'll see how simple yet robust it is in the number and detail of parameters tracked. Of course, you can also export all reports in XSLX or CSV format.
You can learn in more detail about working with reports in our article.
✅ Take full advantage of integrations
Interconnectivity is extremely important today. We are aware of this, which is why we offer the possibility to connect your Sloneek account with other commonly used office tools and software. You can integrate and manage them in My Profile / Integration and Settings / Integrations respectively. Detailed instructions on how to proceed in specific cases can be found by clicking on the following links:
✅ Trust box and whistleblowing
You don't need to set up anything in the trustbox, it's just a good idea to familiarize yourself with how it works. If you need to implement a whistleblower protection system in light of legislation, be sure to check out our solution here.
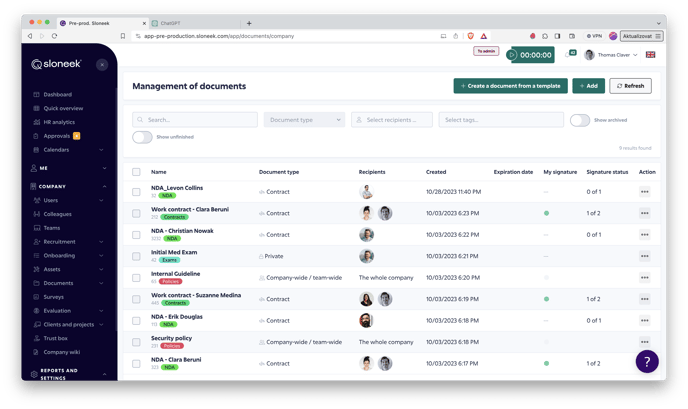
✅ Share documents with your colleagues
In Sloneek you can sign documents with an electronic signature compliant with the EU eIDAS standard. This allows you to electronically process not only employment contracts, but also directives, regulations and other documents that you need to have signed by users.
However, you can also sign documents with those persons who do not have an account in Sloneek. All without a limit on the number of signatures.
Check out the short article describing the actual work with documents, you'll also want to see how signing works, or how to work with templates to simplify the work of generating the documents you assign.
✅ Now just check the billing information
We're at the end of the guide and there's only one thing left to do to use Sloneek smoothly: fill in the company's billing information in Settings. In this section, you can also save your credit card to simplify future transactions or add an email address to the person responsible for billing in your company. All invoices will then be sent to the company's main contact email (which you can also change from this section) and to the newly added address.
Please note: We do not store your card details under any circumstances.
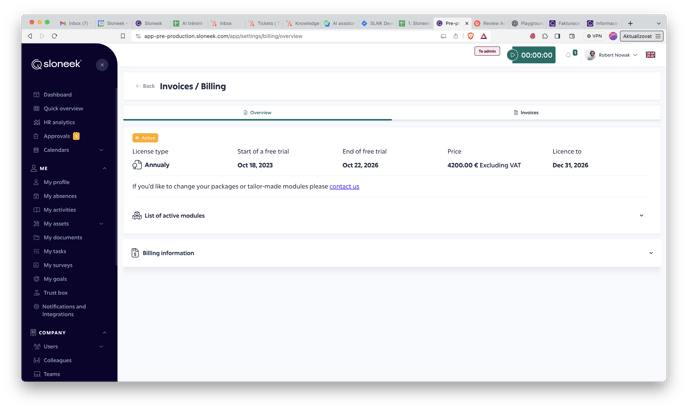
As always, if you need help with payment details or invoices, you can read about it in our Help Center or contact our support team. 🙂
The basic application setup is complete!
Take advantage of all the benefits that Sloneek brings, and if you have any suggestions for improvement or just need help with anything, let us know right away. 🙂
If you already want to let the user into the application at this stage, make sure to communicate well. We know from experience that bringing an app into a company can be quite painful. That's why we've prepared a detailed guide for not only you, but also your people on the First Steps in the app. The information is clearly broken down by role, including a downloadable manual.
In order for users to log into the app, you need to activate them.